Tuesday, April 21, 2015

Childhood Nostalgia: Pineapple Upside Down Cake

What could be better than a decades-old memory brought back to life in living flavor?


Let me start by making one thing clear: I'm not one to have lots of fond food-related childhood memories.  The reasons for this don't belong on this post, however.  This post is about one shining example of childhood imprinting on the subject of taste, history, and process, as pertains to one particular food.  In this case, it is pineapple upside down cake.

I remember being a very young child, growing up in Caracas, Venezuela.  The year was 1970 or 1971, so I was 5 or 6.  My mother had recently acquired her first set of matching cookware.  It was a set of Wear-Ever stainless steel pots and pans.  I recall thinking that they were so pretty.  Not only were they shiny and neat, they looked like they all belonged together, despite being different shapes and sizes.  A family of saucepans, skillets, and lids.

The set came with a booklet containing mostly recipes.  Of all the recipes on it, I only recall one: the pineapple upside down cake.  I remember being able to read it, and I was so proud that I could "help" Mom by telling her what ingredients she needed, and what to do next.

I remember specifically the big frying pan with straight-up sides (I have learned since that it most likely was a 3-quart sauté pan), which went straight into the oven with the whole mess of pineapple slices, sugar, cherries, flour, and eggs, and came out as a wonderful gooey thing that made a resounding *PLOP* when turned over onto a plate.  I remember the buttery flavor of the cake, the crispy texture of the topping, the way the maraschino cherries peeked out of the center of the pineapple slices, and how the kitchen smelled when it baked.

Amazingly enough, I can safely wager that it had been nearly 30 years since I last ate any pineapple upside down cake at all, and I can certainly say that I had never made one before.

But, a few days ago, in a fit of childhood nostalgia, I decided I wanted to make one.  You'd think that it would be as simple as finding a recipe, buying the ingredients I didn't already have on hand, and going to town.  But things are rarely that simple.  On the recipe front, I decided I needed to go straight to the source, so I called my mother to ask her if she remembered making the cake, and whether there was anything special about it.  She said she lost that booklet years ago, but she sent me another recipe she had used throughout the years, from a 1972 Danbury Press collection named "Grand Diplôme Cooking Course".   This recipe lacked the brown sugar topping I remembered, so I decided not to use it.

I took my search to the good old Internet.  I found a site named Tory Avey: Inspired by Our Delicious Past.  The site featured a page on Pineapple Upside Down Cake, with history of the upside down cake in America and the world, as well as two different recipes. for the pineapple variety.

I chose to use the main recipe, as it was the one that most resembled my memories of the classic dessert: brown sugar topping, buttery basic cake batter, creaming sugar/butter as the first step.  The only fundamental difference between my setup and the one I remember from decades ago was the fact that I used a 10" cast iron skillet, rather than a stainless steel sauté pan.

The results were simply outstanding.  From the delightful aroma permeating the house, to the golden surface of the cake layer, and, best of all, the satisfying noise of the gooey topping releasing from the bottom of the pan as I turned the cake onto the plate.

When I tasted it, I was six years old again.  That's all.

Here is the recipe I used.  I made only one modification to the original from Tory Avey, in that I used a whole cup of dark brown sugar for the topping, rather than 3/4 cup light brown sugar and 1/4 cup dark brown that Tory Avey calls for.

TOPPING INGREDIENTS:

  • ¼ cup unsalted butter, melted (½ stick/2 ounces/60 grams)
  • 1 cup dark brown sugar (5.75 ounces/170 grams)
  • 7 canned pineapple slices (½-inch thick), drained, or fresh pineapple slices
  • maraschino cherries, or 7 pecan or walnut halves
BATTER INGREDIENTS:
  • 1¾ cups all-purpose flour, sifted, or ¾ cup all-purpose flour and ¾ cup cake flour (7.5 ounces/210 grams)
  • 1½ teaspoons double-acting baking powder
  • ½ teaspoon salt
  • ½ teaspoon ground cinnamon
  • ½ cup unsalted butter softened (1 stick/4 ounces/115 grams)
  • ¾ cup granulated sugar (5.25 ounces/150 grams)
  • 2 large eggs (6 tablespoons/3.5 ounces/100 grams)
  • 1½ teaspoons vanilla extract 
  • ½ cup pineapple juice or milk (4.25 ounces/120 grams)

  • Position a rack in the lower third of the oven. Preheat the oven to 350°F (325°F for a convection oven).
In a 9- to 10-inch ovenproof skillet (it will produce flared sides) or 10-inch round baking pan (for straight sides), stir in the butter and brown sugar, then spread the mixture evenly over the bottom of the pan.

Arrange pineapple slices on the pan, starting by placing one slice in the center, and placing 6 slices around the center slice.  If you use a 9- or 10-inch pan, there will only be room for the seven slices, and the appearance of your cake will be the classic array.  Place a cherry or nut half in the center of each pineapple slice.

  • Like this:

  • In a medium size bowl, sift the flour, baking powder, salt, and cinnamon.  If you don't have a sifter, you can use a medium-mesh sieve.  Confession time: I actually use a whisk in order to sift dry ingredients for baking.

    In an stand mixer bowl, or in a large bowl with a handheld mixer, beat the butter on low speed until soft and creamy, about 2 minutes.  Increase the speed to medium.  Add the sugar gradually, and beat until fluffy, about 4 minutes.  
  • Beat the eggs in one at a time, scraping down the bowl fully after each egg.  After the eggs are fully incorporated, add the vanilla extract and mix thoroughly.

    Add the dry ingredients and pineapple juice in alternating portions, 4 portions dry ingredients, 3 portions juice, starting and ending with the flour mixture.  Stir on slow until it is completely blended.

    Pour the batter over the pineapple topping:
  • Bake the cake at 350º Fahrenheit, until a toothpick comes out clean, 45-55 minutes.  The top of the cake will be golden:
  • Remove from the oven and let the cake cool on a rack inside the pan, for about 15 minutes.  When cooled, turn over onto a serving plate:


  • Serve warm or at room temperature.

    A NOTE ABOUT SLICING:  The way the pineapple slices are arranged in this cake requires that it be sliced in 1/6 or 1/12 pieces.  Cut through the center slice, and keep cutting outward, lining up the knife either between the outer slices, or exactly through the middle of one of the outer slices.  Please don't try to cut it anywhere else.  You will experience the heartbreak of squishing down the pineapple and ruining perfection.  Don't do it.

  • Enjoy!

Thursday, November 21, 2013

Real Men Eat (Sausage, Broccoli, and Cheddar) Quiche

A dear friend once accused me of "fixing cars and baking cakes."  I suppose he was referring to the manner in which I blithely prance across gender lines, at least in how I apply my skill set.  I simply have never seen any reason to limit the things I am willing to do based on something as irrelevant as chromosome status.

This is why, when I encounter someone who does something that requires more effort than I am willing to put forth, I say "you're a braver man than I am."  300-pound deadlifts come to mind.  I simply don't have the balls for it.

But, I digress.  This whole discussion of gender roles as limiting factors is nothing but a cute way to introduce tonight's dinner (and tomorrow's breakfast): Sausage, Broccoli, and Cheddar Quiche.

Quiche is one of those dishes that can be enjoyed any time of day.  The egg base says breakfast, the pastry crust says lunch, the fillings can speak to a light supper, or more substantial if you are accompanying it with a bowl of hearty soup or plan to follow it with a rich dessert.

This one follows a simple formula I found online: a custard made with 6 eggs, 1 cup heavy whipping cream, and 8 oz shredded cheese.  This formula yields a very creamy and dense filling, which holds up well when hot, and is decadently goopy when refrigerated (one of my avowed guilty pleasures).

I often make crust-free quiches, but tonight I chose to go whole-hog and make a crust.  You can use a premade crust if you don't feel confident in your pastry-making abilities, but a crust from scratch is quite simple.

I used a false-bottomed 9" quiche pan, a full 2" tall.  This makes it easier to slice and serve.  But a deep pie plate will work just as well.  However, be mindful that you do not overfill a shallow pie plate.

Now, the method:

Preheat oven to 375º Fahrenheit

CRUST:
  • 1 1/2 cups all-purpose flour
  • 4 oz (1 stick) butter (I used salted), chilled, and cut into 1/2" dice
  • 1/4-1/2 teaspoon salt (or to taste)
  • 1/4 cup ice water
In a food processor (or in a bowl using a pastry cutter), blend together the butter, salt, and flour, until it has the appearance of cornmeal.  Continuing to blend, slowly add in the ice water, until the dough begins to hold together.  Now, at this point, most recipes will tell you to wrap the dough ball in plastic and refrigerate for half an hour or more.  I didn't do this.  I was hungry.

Sprinkle your counter with flour and roll out the dough into a circle approximately 13" in diameter.  It won't be perfect  Don't stress.  If there are bits missing from one end and sticking from the other end, just use moist fingers to pick up the extra bit from one side and stick it on the other side.

Line your pie plate or quiche pan with the pie crust.  Make sure you press the dough firmly against the bottom and sides of the pan.  Trim the edge of the crust.  You can save the trimmings and make mini pies or just accumulate them for a future frugal quiche or pie crust.

Many recipes tell you to blind-bake your crust.  This is not necessary, so don't even bother looking it up.

FILLING:
  • 1 pound breakfast sausage
  • 1 medium onion, finely diced
  • 1 pound broccoli florets, thawed, chopped, and drained
  • 6 eggs
  • 1 cup (8 fluid ounces) heavy whipping cream
  • 8 ounces grated cheddar cheese
  • Salt and pepper to taste
In a heavy skillet, crumble and brown the breakfast sausage along with the onion.  When the onion is soft and translucent, remove from the heat and add the chopped/drained broccoli.  Set aside to cool for a few minutes.

In a large bowl, mix the eggs and cream.  Add in the cheese and sausage/broccoli mixture.  Stir until well mixed.  Season with salt and pepper.

Pour the filling into the crust, and bake at 375º for 1 hour and 15 minutes, or until set and golden on top.  The quiche is cooked when it springs back to the touch, or when a toothpick or cake tester comes out clean.  If you have an instant-read thermometer, check that the internal temperature is at least 160º F.

Remove from oven and allow to cool at least 20 minutes before serving.  I don't want anyone blaming me for their case of "quiche mouth."  


Monday, February 4, 2013

When in Doubt, Eat More Fat... Part 1: Homemade Greek Style Yogurt

"When in doubt, eat more fat."

It's a phrase I've been using for over a decade, since my years as an Atkins dieter.  It has the lovely ring of dietary defiance in the face of our modern low-fat dogma.  Six syllables that make most casual readers and listeners react as if merely hearing them would make their arteries slam shut instantly.

However, throughout my vagaries in the dietary and culinary world, and across the dietary continuum, the phrase has held fast as a basic principle of my lifestyle.  No matter how I choose to care for myself, a generous proportion of dietary fat, especially saturated animal fat, is an ever-present element in my daily menu.

Whether this is scientifically sound or medically advisable, it is not my place to say.  It is my personal preference, and I have excellent health markers to assuage any apprehensions my health practitioner may have about these choices.

However, we live in a world where people have been convinced that dietary fat is the enemy, not only to their waistlines, but to their hearts, arteries, and lives.  Somehow the public has been sold the line that if they eat fat, every single molecule will turn into The Blob inside and outside of them.

This has resulted in our supermarket shelves being taken over by all sorts of defatted products claiming to be suitable substitutes for the unmodified thing.  Low-fat mayonnaise, salad dressing, cheese slices, hot cocoa packets, and, of course, yogurt.  

Yogurt, dear yogurt.  Humans figured out somewhere along the way that fresh milk they extracted from their captive mammals didn't stay fresh for long, and they decided to make the best of it by taking spoiled milk, calling it food, and eating it.

Somewhere in the middle of the 20th century, yogurt gained popularity in the United States by being touted as a health food.  And, on many levels, rightly so.  Yogurt is nutritious, easy to eat and to digest (f you're not lactose intolerant), and versatile.  A cup of yogurt can buy you a few hours between hunger and your next solid meal.  Yogurt it can be either eaten straight up, or mixed with all manner of sweet and savory elements, and it can do duty as breakfast, snack, lunch, dinner, dessert, salad dressing, or cupcake topping.  

Nowadays, even the smallest and sparsest grocery store boasts DOZENS of yogurt varieties, an overwhelming array of brands and flavors, package sizes, colors, real and imagined languages, and health enhancing claims (Activia, anyone?).

As of the past decade, "Greek style" yogurt has skyrocketed in popularity.  This type of yogurt is nothing more than regular yogurt that has been strained through a fine sieve or cheesecloth to remove half the water content.  Richer, thicker, tastier than unstrained yogurt.  Once you have become accustomed to Greek yogurt, regular yogurt tastes like a watery, runny mess.

99% of these yogurts are fat-free.  Worn as an obligatory badge of validity, the number ZERO is proudly displayed on each package, wooing potential buyers with the promise of a tasty and nutritious tidbit without the threat of increased ass girth.

There are a few brands out there that offer whole-milk yogurt, but even those haven't been immune to the low-fat tide.  FAGE, which has been the one brand in which those of us seeking a respite from the avalanche of fat-free yogurts, has "improved the nutritional profile" of their ORIGINAL formula by cutting the fat IN HALF. Two years ago, a cup of FAGE had 260 calories, 200 of which were from tasty, delicious butterfat.  The current formula has 220 calories, only 100 of which are from fat.

Sigh.

Not to mention that the average price for a quart of high-quality yogurt is about eight bucks in early 2013, I had to take matters into my own hands.  I decided to start making my own.   

Finding out how to do it wasn't difficult.  The web is full of do-it-yourself blogs for anything from eco-conscious friendship bracelets to bacon-based architecture.  How to make your own Greek style yogurt yielded dozens of sites.

The basic procedure is the same for all of the recipes.  Heat up milk to kill any unwanted bacteria, bring it down to a temperature that will allow the culture to grow without killing it, add some old yogurt, and ignore it overnight.  Chill thoroughly, strain for several hours (up to a day) and then serve.

Many recipes are made with reduced-fat or skim milk, and they seek to enrich the texture by adding powdered nonfat milk, gelatin, or other additives.  Please, if you want your yogurt to taste better, you might consider going in the other direction.

When I tried my first batch, I chose a very basic recipe, which uses only milk, yogurt, a pot, an oven light, and a colander lined with cheesecloth.  I made a few batches this way, and it was a satisfactory outcome.  One day, I was low on whole milk, so I used a mixture of 50% milk, and 50% half-and-half.  Much as I say "when in doubt, eat more fat," it was a bit of butterfat overkill.  Still, the addition of extra cream had some merit, so I played with the mixture a bit more.

I ended up with the following recipe:
  • 7 cups whole milk.  Use whatever milk you like, organic, industrial, raw, pasteurized, I don't care what dietary ideology holds your fancy, just make sure it isn't defatted milk.
  • 1 cup heavy whipping cream
  • 2-3 tablespoons plain yogurt.  You will need to use some pre-made yogurt as the starter for your first batch.  This will be a good use for that 0% yogurt you are no longer going to be eating.  For subsequent batches, you will most likely use the last bit of the previous batch.  Or, if you have a Husband like mine, you will need to set aside the next batch's starter before you make the yogurt available for human consumption.
You will also need:
  • A heavy-bottom saucepan or stock pot able to comfortably hold 2 quarts of liquid
  • A digital thermometer (an analog one will do, too, but it doesn't beep, and I like the beep)
  • An immersion blender.  Don't say a whisk, it won't work the same.  
  • An oven with a pilot light or light bulb
  • A large colander nested into a large bowl
  • Cloth for straining the yogurt.  Most recipes recommend using 4 layers of cheesecloth.  I have found out that I can do just as well with a cotton cloth napkin, a clean cotton dishcloth (not terrycloth), or a handkerchief.  You can wash and reuse those, rather than having to throw away the cheesecloth after a use or two.
Yogurt making is best begun in the evening, a few hours before bed.

Place the milk and cream in the saucepan or stock pot, over medium heat.  Heat to 180º Fahrenheit.  Remove from heat and set aside to cool.  Let it sit for at least an hour (maybe longer, depending on how warm or cool your kitchen is).  When the milk/cream mixture has reached 100-105 degrees, add the plain yogurt.  

While the milk cools, turn on your oven to its lowest setting.  When it has come up to temperature, turn it off, and turn on the oven light.  Some recipes say you can use the pilot light in a gas oven.  I have not tested this.  The warmth from the light bulb in my electric oven works perfectly.

You will notice that, as the milk cools, it develops a "skin."  Early in my yogurt-making days, I would remove it or strain it out, until I realized that I was losing a goodly amount of vital butterfat from my blend every time I did this.

Here is where the immersion blender comes in: you want to blend that butterfat back into your yogurt.  A whisk can't do this.  Trust me, reincorporating that fat into the mix makes the difference between great yogurt, and sublime yogurt.  The immersion blender works best.  If you don't have an immersion blender, you can use a glass blender, but, really, better spend $20 at Costco or Sam's and get one of those stick blenders because they do so much so well and you will wonder how on earth you ever lived without one.  

Add the yogurt starter into the pot, and blend again.

If you want to use a glass blender, simply pour 1-2 cups of your milk mixture into the glass, and dump the skin in, as well as your yogurt starter.  Blend it all up and then stir it back into the pot. 

Now, cover your pot with its lid, or with a clean dishcloth.  Put it in the oven with the light on, close the oven door, and let it sit overnight.  I let mine brew for a minimum of 8 hours.

In the morning, the yogurt should have firmed up.  Ideally, it looks like the stuff in a tub of old-fashioned Dannon.  Pull the pot out of the oven, turn off the oven light, and put the yogurt in the fridge.  Let it cool thoroughly.  Mine is usually cool enough by early afternoon.

Nest your colander and your bowl, and line the colander with your cheesecloth.  Carefully dump the yogurt into the cheesecloth.  I say carefully, slowly, so that the weight of the yogurt doesn't make the cheesecloth fold into itself and make you very unhappy trying to dig it out from under the yogurt.  When all the yogurt is in the bowl, fold the corners of the cheesecloth on top of it, and place the colander/bowl/yogurt into the fridge.  

Check the yogurt every couple of hours and pour out the whey that collects in the bowl.   Keep doing this until no more whey comes out of the yogurt. After the first two hours, I also put a flat weight on it (a dessert plate with a heavy bowl on it), to help squeeze out the whey. I like to leave it draining from early afternoon until the next morning.  If you can't check it every couple of hours, it's okay, but the whey will pool in the bottom of your bowl and it will come up to your yogurt.  You will want to let it sit in the cheesecloth at least a couple of hours after draining it before removing it from the cheesecloth.  The point is to remove as much water as possible from the yogurt.  It is this absence of water that makes it "Greek style" and gives it that rich texture and flavor.  You will lose about half the volume in whey.  

So far, my research has not yielded any use for the whey, other than feeding it to pigs or something.  I just throw it out.

After the yogurt has drained sufficiently, scoop it out into a container.  If you're both careful and lucky, you'll be able to peel the thick yogurt away from the cheesecloth without having any yogurt left behind.  Not only does this maximize your yogurt yield, but it also makes cheesecloth cleanup easier.  I can make a batch of cheesecloth last me about 5 batches of yogurt, before it gets totally unraveled.

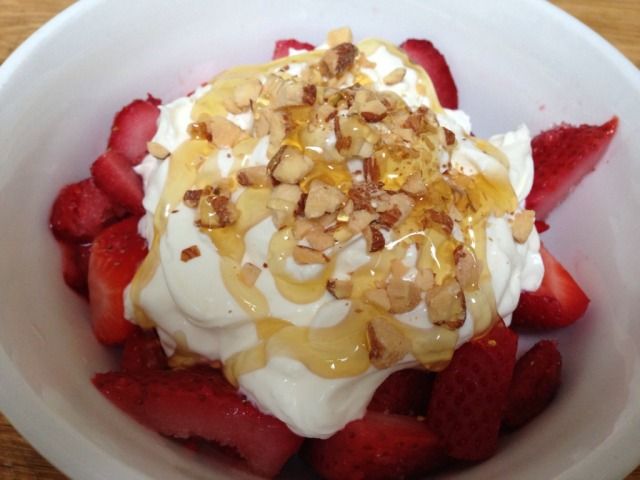
Enjoy your yogurt with fruit, jam, honey, nuts, as tzatziki sauce, a base for salad dressings, or straight up with a spoon.

This bowl is a common sight in our house, and can appear at any moment in time, and for any meal.


Go ahead, eat the WHOLE THING! Single-Serving Desserts, Part 2: Individual Cheesecakes

There are times in life when we need cheesecake.  It's that simple.  It's not a want, it's a need.  Even people who are lactose intolerant, even raw vegans, cannot resist the creamy decadence of this rich dessert, as can be inferred from the profusion of "cheesecake" recipes that comply with various non-ominvorous dietary protocols.

Fortunately for me, I have no need to draw a qualitative line in the sand against cheesecake.   But I do draw a quantitative line in the sand against most full-size cheesecake recipes.  Seeing as I usually cook for just Husband and myself, I am not interested in making a 12-slice behemoth, which I then either have to face down for weeks, give away to friends and neighbors, or end up throwing in the trash.

There is a special delight in consuming a dessert until it is ALL GONE.  Of course, the trick lies in licking and scraping the bottom of the serving dish without ending up needing to shop at Omar The Tentmaker's for my finery.  Single-serving desserts address both of these concerns.  So, in my continuous effort to find ways of making desserts that will allow me to enjoy the good stuff without getting mired in excess, I spent quite a while looking at blogs and recipe sites for single-serving cheesecakes.  I kept running into the usual problem of "large batch recipe baked in a million small molds," as if everyone who wants cheesecake ALWAYS has a dozen people to feed. After much looking, I finally found what I was seeking... in a dieting website, where the members have a vested interest in creating self-limiting indulgences, without running the risks involved in having a lot of leftovers around. 

The recipe is simplicity itself.  It doesn't have a crust, although you can make a simple crust by grinding a couple of graham crackers, mixing them with a small amount of melted butter, and pressing into the bottom of your ramekins.  Because I don't usually buy graham crackers and didn't want to buy a big box of them just for the one recipe, I used a lunchbox snack pack of Barnum Animal Crackers.

This recipe makes two servings.  One for Husband, one for me.

Preheat oven to 300º F.  I use the toaster oven.  Boil enough water to fill a small baking pan halfway.

Using a mini food processor, grind 2 oz cookies or graham crackers, and mix in 1-2 tablespoons melted unsalted butter.  Divide cookie mixture into two 1/2 cup ramekins and press into the bottom.  I used an espresso coffee tamping thingie doodad.

In a tall glass using an immersion blender mix together:

4 oz cream cheese, softened (1/2 package)
1 large egg
1 tablespoon sour cream
1 teaspoon lemon juice
2 tablespoons granulated sugar
1/4 teaspoon vanilla extract

Make sure you don't overmix.  Overmixing is the main reason cheesecakes crack.  Something about the protein in the egg losing elasticity, similar to the way kneading bread dough develops the gluten in the flour.  If you don't have an immersion blender, you can try using a fork or a whisk in small bowl.  Just don't try to use the electric mixer, unless you are fond of cheesecake splatter as a wallpaper pattern.

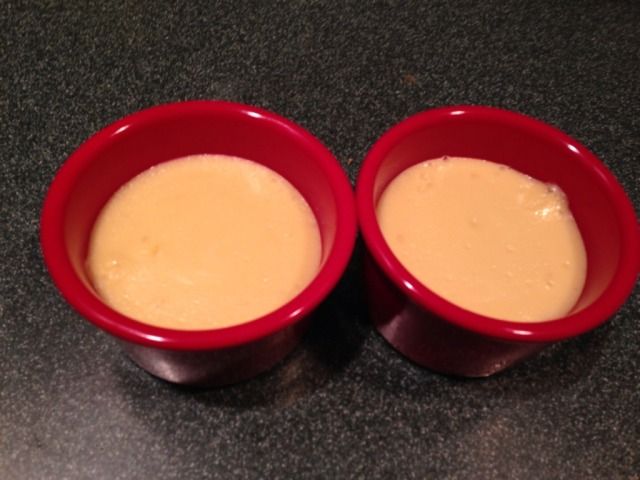
Divide mixture into the ramekins where you prepared the crust.  Place ramekins in the baking pan, pour boiling water into the pan, and place the pan in the oven.  Bake at 300º F for 30 minutes.  Turn off the oven and let the cheesecakes cool slowly inside it.  When they are close to room temperature (approximately an hour later), remove ramekins from oven and place in the refrigerator.  Chill overnight before eating.

You can eat these plain, top with fruit, chocolate ganache, or whipped cream.  And you don't even have to share.  Go ahead, EAT THE WHOLE THING!!!!!

Tuesday, November 6, 2012

The Family That Eats Together... GETS FAT TOGETHER!!!!

I know right off the bat that the title of this blog entry will be seen as a statement of flaming psycho-social heresy.  Don't we always hear "The family that eats together, stays together"?  And, what exactly does this mean?

The traditional maxim about familial togetherness implies that eating in the same room at the same time is essential to bonding between family members.  It is accepted as a universal truth that communal food consumption is required to establish and maintain genuine communication with our loved ones.

Even when family has successfully performed its function, and raised self-reliant individuals who are running households of their own, separate from their parents, there is the obligatory tradition to reunite during specific times of the year... to do little but inflame old family drama... and EAT.  Of course, I contend that a lot of the reason we overeat during family holidays is to distract ourselves from the tensions and conflicts between ourselves and our blood kin, but I digress...

A large portion of my recent reflections about food and eating have had to do with the concept of responding to hunger appropriately.  Eating when your body needs fuel, rather than for entertainment, emotional comfort, or social compliance.  Eating the amount of food that your body requires to run operations, rather than overeat or undereat for reasons outside of energy requirements.  Basically, eating when hungry, and, when hungry, eating.

When we eat in the absence of hunger, and when we do not obey the presence of hunger, the consequences aren't simply levels of physical discomfort associated with out-of-phase digestive functions.  Eating without hunger and ignoring and postponing responding to the body's call for fuel will trigger the body's metabolism hormones in ways that, when repeated over time, will manifest in what we are beginning to know as "metabolic syndrome" (weight gain, diabetes, heart disease, etc.).

What does this have to do with eating together as a family?

Before we get to "family," let's examine a nearly universal phenomenon in our world: when single people pair up and form a couple, one or both of the partners will gain weight.  The simple and obvious reason is that having someone to eat with is a whole lot more fun than eating alone.  And, for that very reason, most of us will concede to eating when we aren't quite hungry, going hungry for a bit longer than we otherwise would, and eat something other than what we would choose independently, all for the sake of eating the same thing, at the same time, in the same room as the other person.

For the sake of convivial and communal eating, we are willing to disregard our bodies' extremely fine-tuned framework of hunger/satiety signals.  We will endure hunger, ignore satiety, and turn away from our genuine food preferences, because "eating together" is so important.  And we accept the ensuing gain of body fat as a "natural" part of the pair-bonding process.  I know it.  I did it.  Husband did it.  Virtually every single couple I've known has done this, at least at the start of their relationship.

When a couple has children and becomes a family, this problem gets compounded.  I don't have children, but I was a child, and I know that eating/food/meals are a virtual battleground in the majority of families.  Even the most level-headed of familial units have an undercurrent of control struggle when it comes to the simple act of refueling the body.  Family members are entreated to eat at the designated mealtimes, even when they aren't hungry.  Likewise, we are instructed to "wait for dinner," even though we may be hungry for a full meal NOW, and dinner is an hour away.  Children are told to clean their plates, even if they are already satiated.  The more "desirable" foods, such as ice cream, are withheld until the seemingly punitive fare of carrots and green beans has been consumed.  And, of course, when we engage in familial eating, we are more than likely to consume what's being served, whether that is what our bodies are craving or not.

All of these factors contribute to a behavioral paradigm of forcing our eating patterns to comply with directives outside of our bodies' signals for when, how much, and what to eat.  The more we focus on those outward guidelines, the more we lose touch with what our bodies are trying to tell us.  And it is precisely this disconnect from our natural rhythms which is at the root of our food-based afflictions.  We get fat and sick because we eat when we aren't hungry, we don't eat when we are hungry, and we don't pay attention to our bodies when it comes to choosing which foods to consume.

The draw to eat together is very strong, because our culture is largely centered around creating the illusion that convivial eating signifies deeper interpersonal bonds, and consequently a happier existence.  However, the important part is to BE together, to SHARE experiences and feelings.  Eating in the same room at the same time as our loved ones doesn't make or break our love for each other.  Getting fat because we're overriding our bodies on account of eating "together" does undermine our own sense of individual confidence and happiness, however.

I think that the world would be a better place if we were brought up to have prandial independence, and to accept convivial eating as a matter of serendipity, rather than entitlement.  We would be individually accountable for responding to our bodies' fuel requirements.  We wouldn't be getting angry that our partners aren't eating what we want to eat.  We wouldn't be going hungry in order to wait for others to have the time to sit at the table with us.  We wouldn't be putting food in our mouths despite not being hungry, just because we're sitting at the table t the same time as the others. 

And, more likely than not, far fewer of us would be fat.

Thursday, September 27, 2012

When Hungry, EAT!

One of the earliest entries I wrote on this blog is titled Eat Only When Hungry.  The concept is very simple: eat when you feel the physical need for fuel, and stop eating when that need subsides.  It is the basic foundation of a healthy and balanced relationship with food.  It's one of those concepts that, along with "everything in moderation" has been so overused in the discourse about health and fitness, it has been reduced to mere platitude, despite its incontrovertible validity.

Anyone who has sought to heal a damaged relationship with food has some understanding of the damaging effects of eating for reasons other than hunger.  We also understand how eating solely to refuel is extremely challenging in a society in which gratuitous eating is ubiquitous, and eating exclusively to meet the body's energy needs is considered nothing short of quaint.

The part of this equation which is seldom discussed is the not always obvious corollary of always heeding the presence of hunger.  

Our society is afflicted by an attitudinal paradox when it comes to eating.  Everywhere we turn, there is the perceived obligation to consume food at times other than when our bodies require refueling.  To name a few: the birthday cake for the office colleague, the second and third trip to the all-you-can-eat buffet, Halloween/Valentine's/Easter candy, the proverbial "holidays," and even regular meals on an arbitrary schedule.

And, although eating seems to be a ubiquitous, sine-qua-non element in all sorts of social and antisocial situations, eating as an operational priority in the management of our everyday lives has actually been relegated into a very low rung indeed.  

We all have been guilty of claiming ourselves "too busy to eat."  Every single person I know has said this at some time or another.  Skipping breakfast on account of "no time" is a popular mantra, regardless of whether hunger is present or not.  Working late into the evening, not responding to the body's call for fuel until it becomes a full-throttled scream that goes beyond the form of a grumbling belly and eventually morphs into our inability to continue that which was keeping us from eating in the first place.    "I have a job, I have kids, I have..."  Sound familiar?  We let our perception of being "needed" by things and people outside of ourselves interfere with the primary form of physical sustenance that enables us to meet those requirements.  We conveniently forget that, if we don't give our bodies adequate fuel, the job suffers, the kids suffer, everything suffers.  

So, we are pulled in two directions: 
  1. The social imperative to constantly eat for a myriad reasons, all of which are dissociated from the body's physical needs
  2. The de-prioritization of refueling ourselves within the hierarchy of our daily activities.  
Not content with eating for non-fueling reasons, or with disregarding the body's cry for nutritional replenishment, we often combine the two, in an unabashed orgy of misguided behaviors.  We decline to eat all day in order to "save room" for that special food or event later in the day.  We skip lunch because we're going out for burgers and drinks with the colleagues.  We survive all day on black coffee in anticipation of date night at a fancy restaurant.  And, of course, we endeavor not to eat at all for about nine days prior to Thanksgiving.

What these two tendencies have in common is that they are both manifestations of disrespecting both the absence and the presence of physical hunger, in favor of societally or circumstantially imposed factors.

I wholeheartedly believe that this ubiquitous disconnect from our bodies and our sense of genuine hunger/satiety is at the root of the epidemic of obesity and associated diseases that plagues the Western world.  

Most of the health, nutrition, and fitness literature which deals with appropriate eating (in the presence of hunger) versus inappropriate eating (in the absence of hunger) focuses solely on how detrimental it is to eat in the absence of the need for fuel.  On the flip side of the issue, only the "Intuitive Eating" movement (with which I have a love-hate relationship, for reasons that I won't expound here) is the ONLY source where the concept of paying attention to hunger promptly and appropriately is even examined.  "Honor your hunger," is what they call it.  I feel that the sentiment needs slightly stronger language.  "Respect your hunger," or even better, "OBEY your hunger."

I can't emphasize enough the importance of this much-neglected matter.  It is an issue of basic self-care, and sensible operational logistics.  You don't hear anyone saying "I have to drive from New York to Chicago by tomorrow afternoon, but I don't have time to stop for gas."  If you tried that, you just wouldn't make it. It's that simple.  And yet we have no compunction about pushing our bodies to run on fumes until that project is completed, or until we have gotten to Chicago after a 16-hour drive (during which we *DID* feed the car proper fuel, but we made do with a bag of chips). Why do we treat our objects better than we treat ourselves?

We should respect our hunger, because it is not only the kindest, but also the most efficient and healthful way to treat our bodies.  And, if self-love and self-care don't resonate with you, then consider this: ignoring hunger costs you money and makes you fat.  

How so? you may ask.  I'm eating only one meal a day!  Doesn't that limit the calories I'm consuming?  Well, not really (even if you do indeed believe in calories in/calories out): 

  1. Neglected hunger escalates and becomes increasingly difficult to satiate with an appropriate amount of food.  We've all been there.  We have waited too long to eat, or eaten too little beforehand, and we arrive at the table ravenous, unable to stop shoveling food in until we are uncomfortably stuffed.
  2. We become indiscriminate in our food choices, and our sense of physical urgency often leads us to eat whatever is closest at hand, which is likely to be overpriced restaurant or convenience store food.
  3. We are inclined to buy excess food which, if we don't end up overeating, ends up in the trash.  More wasted money.
  4. It unleashes a hormonal reaction in the body which prompts it to lower metabolism and increase the percentage of fuel that gets stored away for future famine.  
Yes, famine.  Even if you have extra fat on you, every time you experience hunger and do not address it promptly with appropriate fuel, your body goes into a state of elemental panic.  It slows down energy output, and it opens up the fat-storage gates in order to receive new deposits as soon as you eat again.

Now, I am not one of those science-wanking bloggers who can quote all sorts of studies and data to support such statements.  I don't need to, because there are writers aplenty out there who already do this, and I know well enough to leave that kind of thing to the experts.  All I know is that the most fattening thing I've ever done in my life is to go hungry without eating.  Hands down the most fattening, far above binging on Häagen Dazs, or the entire period between Halloween and Valentine's Day on any given year.

An occasional, sporadic "got too busy and skipped lunch" isn't terribly damaging.  It is the ongoing pattern of daily disregarding the body's call for fuel that is the real problem.  Neglected hunger ends up escalating into a bottomless, insatiable pit, and a lowered metabolism, which delivers a double whammy of driving us to eat way above our body's needs, and decreased metabolism, which turns that excess into twice the blubber it could have been in the case of a mere occasional overindulgence.  And I'm not going to go into the physical and emotional fallout from becoming overweight and obese.  There's plenty of writing out there on that.

If we use a 1-10 hunger scale, in which 1 is "about to eat the cat" and 10 is "so full I can't even breathe," you should never let your hunger reach below a 3 (Very hungry).  Ideally, you should start procuring food when you are at a level 4 (starting to get hungry but patient enough to take the time to seek or prepare food).  And, as stated in "Eat Only When Hungry," stop when you reach a 5-6 (neutral, wouldn't stop what I'm doing in order to eat).

In this age of round-the-clock access to food, avoiding excess hunger should be nigh on impossible.  But, the reality is that it does take some forethought and planning in order not to allow ourselves to be caught short on the go.  The first thing we need to do is to prioritize fuel for ourselves.  We need to accept that, if we aren't operating our bodies effectively, we won't be able to perform optimally in any capacity.  On the practical level, this means making time and room in order to eat promptly and appropriately.  If you know that you're going to be on the run, bring a portable meal or a substantial snack along, so that you can respond to hunger, even in the whirlwind of other activities.  Prioritize eating regular meals rather than pushing off refueling until the end of the day (or the completion of XYZ).  

When we work in harmony with our bodies, rather than fight against them, we will find that many things in life go a bit smoother.  We manage stress more easily when we are adequately fed.  We have a decreased tendency to become ill.  We have more physical endurance.  And we are more likely to maintain a healthy physique.

So, next time you are about to say to yourself "I don't have time for lunch," think again, and have a sandwich.

Saturday, September 1, 2012

Go ahead, eat the WHOLE THING! Single-Serving Desserts, Part 1: Flourless Chocolate Ramekins

In this blog, I have talked a few times about the balancing act between hedonism and self-care, between indulging the senses and respecting the body's limitations.  There is a fine line separating enjoyment from excess, and one of my aims in life is to stay more on this side of it than the other.

From time to time, I will have a hankering for a rich and decadent dessert, which I most frequently satisfy by diving into a Manhattan pastry shop.  I like to tell myself that I could do it when I go out to dinner at a fancy restaurant, but the reality is that, by the time dessert would have rolled around during a dinner outing, I no longer have any desire for any food.  What can I say?  I'm in love with meat.

When cooking at home, I am disinclined to make desserts because most recipes serve 8-12.  Even though I am a hedonist through and through, I also have limited capacity, not only in terms of metabolizing sweets, but in how long I can remain interested in the same item.  The reality is that, if I make a large cake, I will have one piece, and most of it will end up at the office, because otherwise, it would end up in the trash.

So, I've looked into recipes for single-serving desserts.  They aren't easy to find.  Many times, they are large recipes that someone has poured into single-serving containers or muffin tins, but which are still written in terms of 8+ servings, and aren't easily scalable, especially in terms of baking times.

My friend Charles shared with me an awesome flourless chocolate torte recipe, which I made twice in the full-size version.  Both times, I ended up giving away 3/4 of it because it was going neglected at home after the initial rush of delight.  Fortunately, the ingredients in this simple recipe (eggs, butter, chocolate) are in multiples of 8.  No racking my brain to figure out how to divide 5 eggs to make 8 single servings...

I divided the whole recipe by 8 and came up with a basic formula for a rich, indulgent treat that allows me the luxury of finishing the whole thing without exceeding my body's capacity.

For each serving, you will need:

1 large egg at room temperature

2 oz high quality chocolate, chopped (or chocolate chips)

1 oz (2 tablespoons) unsalted butter 


Vanilla extract (optional) 


Preheat oven to 300º Fahrenheit.  I used a toaster oven.


Using the whisk attachment in a hand blender, beat the egg(s) until foamy and doubled in volume.


In a double boiler over low heat, melt the chocolate and butter until it is incorporated.  I added a sprinkling of sea salt to bring out the chocolate flavor.


Slowly add the beaten egg to the chocolate, one spoonful at a time.


Pour into single-serving ramekin(s) 

Pour boiling water into the bottom of a baking dish, and lay your ramekin(s) in the water bath:


Bake at 300º for 15 minutes.  They will look a bit soft in the center when you remove them from the oven.  This is normal.  The batter will set silky smooth when you refrigerate it.

Refrigerate for several hours, or overnight.


Top with whipped cream and enjoy!

Thursday, December 2, 2010

On Dry Aging Meat at Home: A Photo Essay

This past Thanksgiving weekend, I was subjected to an unexpected visit from parents who live in another country, and whom I hadn't seen in four years.  

The merits or liabilities of such an event aside, part of the visit involved, of course, feasting in a grand manner.  

On their last evening in NYC, my parents took my brother and his wife and daughter, Husband, and me to The Post House for a farewell dinner.  This is one of New York City's most renowned steakhouses, and, as far as my father is concerned, a dining Mecca.  They specialize in dry aged steaks, and they charge a serious price for them.

"Dry aged beef."  What a buzzword.  We see it bandied about everywhere, from medium to top-priced restaurants, often worn as a badge of honor.  

But do we really known what dry aging really means?

These steakhouses would have us believe that dry aging is some arcane secret, only available to those who have received extensive training, have complicated equipment, and therefore are allowed to charge mere mortals outrageous prices for the privilege of feasting on the product of their sorcery.  They want you to believe that if you were to try doing it at home, it would kill you.

If that were the case, Husband and I would have been dead a year ago.

The reality is that dry aging is easy.  You need meat, a rack, and a fridge.  And patience.

Dry aging is the art of turning an ordinary piece of meat into a sublime experience by putting it in the fridge and ignoring it for a minimum of three weeks. The meat will lose some moisture, which will concentrate and intensify the flavor. Also, the enzymes inside the meat will begin to break down the fibers, and tenderize the meat. The less polite definition is that dry aged meat is just meat that is in the early stages of decomposition, but it is controlled decomposition.

Here is what I do:

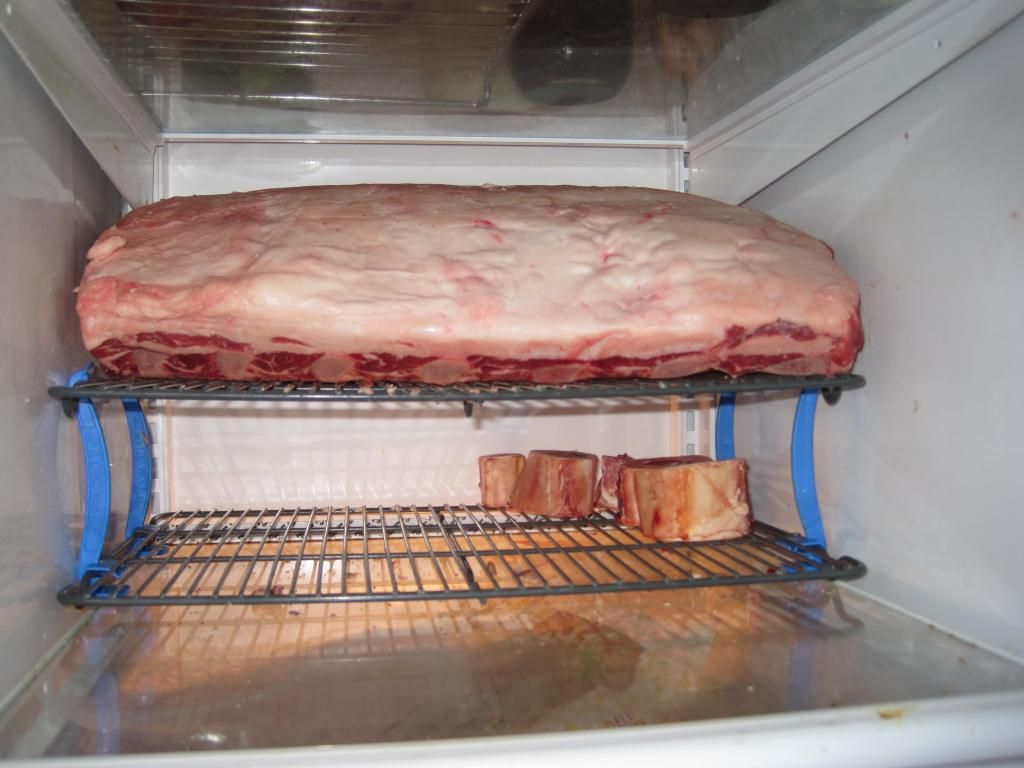
1. Make room in the refrigerator for a large rectangular rack. Mine is a double-tier 11" x 17" cookie cooling rack. It MUST be a rack, because you want the meat to have air around it all the time.
I can fit a slab of strip loin and a slab of ribeye on this rack and age them simultaneously.

2. Get a full slab of beef from your local meat provider. Costco carries some lovely varieties. I have aged ribeye, strip (top loin) and sirloin.  It can be bone-in or boneless.  If you want to make prime rib for Christmas, then bone-in is nicer. Prime grade is nice, but Choice grade turns out just as delicious after the aging process. You want the WHOLE piece in the cryovac plastic wrapper. It will be about 15 pounds. Bring it home.


3. Unwrap the meat in your sink, and dry it off completely with paper towels.


4. Place the meat on the rack in the refrigerator, bone-side down if bone-in.  I do fat-side down if boneless.  It drips less into the bottom of the fridge, or the meat that's in the bottom rack.


5. Here comes the hard part: Ignore the meat for a minimum of 3 weeks (the longest I've had a steak aging was 9-1/2 weeks, but that was the end of a slab that we started cutting into after four weeks). It will get ugly on the outside, really ugly: dark, dry, even a bit moldy. Do not fear. This is nature creating a wrapper of beef jerky to protect the tender steak inside.


6. When you are ready to eat the meat, slice off from the end however much you need. It can be a single steak, or it can be the whole slab for a big party.  The inside of the meat will have turned a lovely deep burgundy.  


Here you can see the contrast between the scary outside and the succulent inside:


7. Trim off the leathery outside from the meat.


The scraps look like this:


If you have a dog, feed him the scraps, and he will love you forever.


8. Now you are ready to cook the steaks. This takes some experimentation, until you get the hang of it. Dry aged meat has less water than fresh meat, so it will cook faster. You will need to play with the temperature of your oven or stove, or the setting on your grill. For a prime rib roast, I would say to sear the outside at 500º F for 15 minutes, and then roast slowly at 325º or 300º until it reaches an internal temperature of about 125. If you don't have a meat thermometer, get one. IKEA sells a lovely (if fragile) one for about seven bucks. Don't do the usual 135º F recommended for non dry aged meat.  Your roast will dry out and you will be very upset.

Here is a trimmed 2-bone, bone-in ribeye roast.  It can feed anywhere from 2-5 people, depending on appetite levels and how much other food you are serving.
Here is the roast, cooked:
Here is the roast, sliced:
Dinner is served:
Bon appétit!