"When in doubt, eat more fat."
It's a phrase I've been using for over a decade, since my years as an Atkins dieter. It has the lovely ring of dietary defiance in the face of our modern low-fat dogma. Six syllables that make most casual readers and listeners react as if merely hearing them would make their arteries slam shut instantly.
However, throughout my vagaries in the dietary and culinary world, and across the dietary continuum, the phrase has held fast as a basic principle of my lifestyle. No matter how I choose to care for myself, a generous proportion of dietary fat, especially saturated animal fat, is an ever-present element in my daily menu.
Whether this is scientifically sound or medically advisable, it is not my place to say. It is my personal preference, and I have excellent health markers to assuage any apprehensions my health practitioner may have about these choices.
However, we live in a world where people have been convinced that dietary fat is the enemy, not only to their waistlines, but to their hearts, arteries, and lives. Somehow the public has been sold the line that if they eat fat, every single molecule will turn into The Blob inside and outside of them.
This has resulted in our supermarket shelves being taken over by all sorts of defatted products claiming to be suitable substitutes for the unmodified thing. Low-fat mayonnaise, salad dressing, cheese slices, hot cocoa packets, and, of course, yogurt.
Yogurt, dear yogurt. Humans figured out somewhere along the way that fresh milk they extracted from their captive mammals didn't stay fresh for long, and they decided to make the best of it by taking spoiled milk, calling it food, and eating it.
Somewhere in the middle of the 20th century, yogurt gained popularity in the United States by being touted as a health food. And, on many levels, rightly so. Yogurt is nutritious, easy to eat and to digest (f you're not lactose intolerant), and versatile. A cup of yogurt can buy you a few hours between hunger and your next solid meal. Yogurt it can be either eaten straight up, or mixed with all manner of sweet and savory elements, and it can do duty as breakfast, snack, lunch, dinner, dessert, salad dressing, or cupcake topping.
Nowadays, even the smallest and sparsest grocery store boasts DOZENS of yogurt varieties, an overwhelming array of brands and flavors, package sizes, colors, real and imagined languages, and health enhancing claims (Activia, anyone?).
As of the past decade, "Greek style" yogurt has skyrocketed in popularity. This type of yogurt is nothing more than regular yogurt that has been strained through a fine sieve or cheesecloth to remove half the water content. Richer, thicker, tastier than unstrained yogurt. Once you have become accustomed to Greek yogurt, regular yogurt tastes like a watery, runny mess.
99% of these yogurts are fat-free. Worn as an obligatory badge of validity, the number ZERO is proudly displayed on each package, wooing potential buyers with the promise of a tasty and nutritious tidbit without the threat of increased ass girth.
There are a few brands out there that offer whole-milk yogurt, but even those haven't been immune to the low-fat tide. FAGE, which has been the one brand in which those of us seeking a respite from the avalanche of fat-free yogurts, has "improved the nutritional profile" of their ORIGINAL formula by cutting the fat IN HALF. Two years ago, a cup of FAGE had 260 calories, 200 of which were from tasty, delicious butterfat. The current formula has 220 calories, only 100 of which are from fat.
Sigh.
Not to mention that the average price for a quart of high-quality yogurt is about eight bucks in early 2013, I had to take matters into my own hands. I decided to start making my own.
Finding out how to do it wasn't difficult. The web is full of do-it-yourself blogs for anything from eco-conscious friendship bracelets to bacon-based architecture. How to make your own Greek style yogurt yielded dozens of sites.
The basic procedure is the same for all of the recipes. Heat up milk to kill any unwanted bacteria, bring it down to a temperature that will allow the culture to grow without killing it, add some old yogurt, and ignore it overnight. Chill thoroughly, strain for several hours (up to a day) and then serve.
Many recipes are made with reduced-fat or skim milk, and they seek to enrich the texture by adding powdered nonfat milk, gelatin, or other additives. Please, if you want your yogurt to taste better, you might consider going in the other direction.
When I tried my first batch, I chose a very basic recipe, which uses only milk, yogurt, a pot, an oven light, and a colander lined with cheesecloth. I made a few batches this way, and it was a satisfactory outcome. One day, I was low on whole milk, so I used a mixture of 50% milk, and 50% half-and-half. Much as I say "when in doubt, eat more fat," it was a bit of butterfat overkill. Still, the addition of extra cream had some merit, so I played with the mixture a bit more.
I ended up with the following recipe:
- 7 cups whole milk. Use whatever milk you like, organic, industrial, raw, pasteurized, I don't care what dietary ideology holds your fancy, just make sure it isn't defatted milk.
- 1 cup heavy whipping cream
- 2-3 tablespoons plain yogurt. You will need to use some pre-made yogurt as the starter for your first batch. This will be a good use for that 0% yogurt you are no longer going to be eating. For subsequent batches, you will most likely use the last bit of the previous batch. Or, if you have a Husband like mine, you will need to set aside the next batch's starter before you make the yogurt available for human consumption.
You will also need:
- A heavy-bottom saucepan or stock pot able to comfortably hold 2 quarts of liquid
- A digital thermometer (an analog one will do, too, but it doesn't beep, and I like the beep)
- An immersion blender. Don't say a whisk, it won't work the same.
- An oven with a pilot light or light bulb
- A large colander nested into a large bowl
- Cloth for straining the yogurt. Most recipes recommend using 4 layers of cheesecloth. I have found out that I can do just as well with a cotton cloth napkin, a clean cotton dishcloth (not terrycloth), or a handkerchief. You can wash and reuse those, rather than having to throw away the cheesecloth after a use or two.
Yogurt making is best begun in the evening, a few hours before bed.
Place the milk and cream in the saucepan or stock pot, over medium heat. Heat to 180º Fahrenheit. Remove from heat and set aside to cool. Let it sit for at least an hour (maybe longer, depending on how warm or cool your kitchen is). When the milk/cream mixture has reached 100-105 degrees, add the plain yogurt.
While the milk cools, turn on your oven to its lowest setting. When it has come up to temperature, turn it off, and turn on the oven light. Some recipes say you can use the pilot light in a gas oven. I have not tested this. The warmth from the light bulb in my electric oven works perfectly.
You will notice that, as the milk cools, it develops a "skin." Early in my yogurt-making days, I would remove it or strain it out, until I realized that I was losing a goodly amount of vital butterfat from my blend every time I did this.
Here is where the immersion blender comes in: you want to blend that butterfat back into your yogurt. A whisk can't do this. Trust me, reincorporating that fat into the mix makes the difference between great yogurt, and sublime yogurt. The immersion blender works best. If you don't have an immersion blender, you can use a glass blender, but, really, better spend $20 at Costco or Sam's and get one of those stick blenders because they do so much so well and you will wonder how on earth you ever lived without one.
Add the yogurt starter into the pot, and blend again.
Add the yogurt starter into the pot, and blend again.
If you want to use a glass blender, simply pour 1-2 cups of your milk mixture into the glass, and dump the skin in, as well as your yogurt starter. Blend it all up and then stir it back into the pot.
Now, cover your pot with its lid, or with a clean dishcloth. Put it in the oven with the light on, close the oven door, and let it sit overnight. I let mine brew for a minimum of 8 hours.
In the morning, the yogurt should have firmed up. Ideally, it looks like the stuff in a tub of old-fashioned Dannon. Pull the pot out of the oven, turn off the oven light, and put the yogurt in the fridge. Let it cool thoroughly. Mine is usually cool enough by early afternoon.
Nest your colander and your bowl, and line the colander with your cheesecloth. Carefully dump the yogurt into the cheesecloth. I say carefully, slowly, so that the weight of the yogurt doesn't make the cheesecloth fold into itself and make you very unhappy trying to dig it out from under the yogurt. When all the yogurt is in the bowl, fold the corners of the cheesecloth on top of it, and place the colander/bowl/yogurt into the fridge.
Check the yogurt every couple of hours and pour out the whey that collects in the bowl. Keep doing this until no more whey comes out of the yogurt. After the first two hours, I also put a flat weight on it (a dessert plate with a heavy bowl on it), to help squeeze out the whey. I like to leave it draining from early afternoon until the next morning. If you can't check it every couple of hours, it's okay, but the whey will pool in the bottom of your bowl and it will come up to your yogurt. You will want to let it sit in the cheesecloth at least a couple of hours after draining it before removing it from the cheesecloth. The point is to remove as much water as possible from the yogurt. It is this absence of water that makes it "Greek style" and gives it that rich texture and flavor. You will lose about half the volume in whey.
So far, my research has not yielded any use for the whey, other than feeding it to pigs or something. I just throw it out.
After the yogurt has drained sufficiently, scoop it out into a container. If you're both careful and lucky, you'll be able to peel the thick yogurt away from the cheesecloth without having any yogurt left behind. Not only does this maximize your yogurt yield, but it also makes cheesecloth cleanup easier. I can make a batch of cheesecloth last me about 5 batches of yogurt, before it gets totally unraveled.
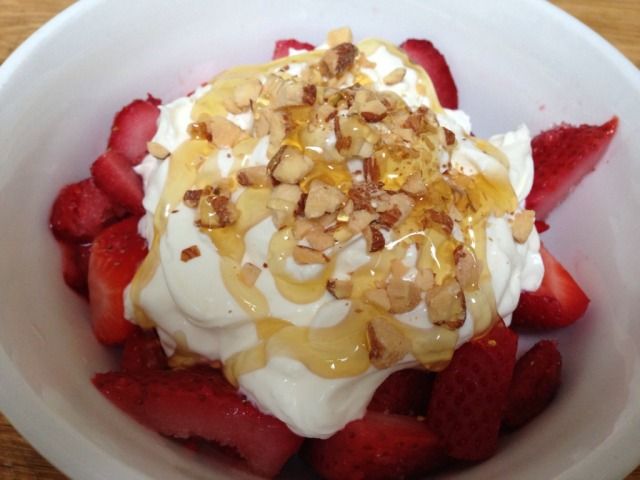
Enjoy your yogurt with fruit, jam, honey, nuts, as tzatziki sauce, a base for salad dressings, or straight up with a spoon.
This bowl is a common sight in our house, and can appear at any moment in time, and for any meal.
Enjoy your yogurt with fruit, jam, honey, nuts, as tzatziki sauce, a base for salad dressings, or straight up with a spoon.
This bowl is a common sight in our house, and can appear at any moment in time, and for any meal.
You can use the whey to ferment green bean spears or carrots or radishes. More importantly, you can use it to make beet kvass -- an amazing health tonic. Look up Sally Fallon"s recipe for beet kvass. It's amazing! Thanks for this article.
ReplyDeleteCarolina:
ReplyDeleteI Googled you after reading your review of Slim in 6 on Amazon. You're an incredibly gifted writer, and I had to track you down to tell you! Thanks for the brilliant review.
Best wishes,
Sam
What clear and concise directions! Thank you! This doesn't seem too scary after all. -Cheers.
ReplyDelete